If you have installed the first or the second preview build of Windows 11, you might have noticed the snap layouts. In Windows 11, when you hover your mouse over the minimize/maximize button, you will see various snap layout options. When you select a layout from the menu, the app Window will follow that layout and change its position. Although the feature is useful, many users find it annoying. If you also find Snap Layout annoying, you can turn them off manually. Also Read: How to Install Windows 11 From USB
Steps to Disable Snap Layouts in Windows 11
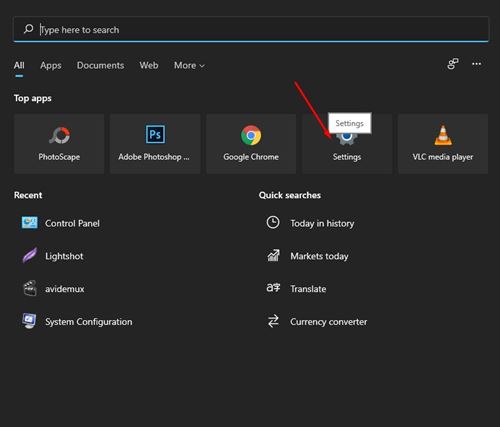
So, in this article, we will share a detailed guide on how to turn off snap layouts in Windows 11 operating system. The process is going to be very easy. Just follow some of the simple steps given below. Step 1. First of all, open Windows 11 start menu and click on the ‘Settings‘ app icon.
Step 2. On the Settings, click on the ‘System‘ option.
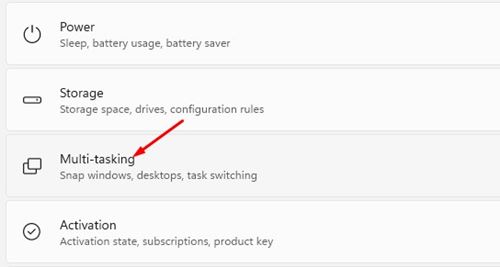
Step 3. On the right pane, click on the ‘Multitasking‘ option.
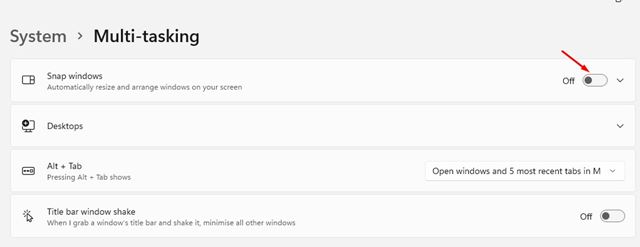
Step 4. On the Multitasking screen, click on the ‘Snap Windows’. Next, click on the toggle button behind the Snap Windows to turn off the feature.
Step 5. Now restart your computer. This will remove the Snap Layouts features. You won’t see any layout option while hovering the mouse over minimize/maximize button. Step 6. If you wish to enable the feature again, turn on the toggle button behind Snap Windows in step 4.
That’s it! You are done. This is how you can turn off Snap Layouts on Windows 11 computer. So, this guide is all about how to turn off Snap Layouts in Windows 11. I hope this article helped you! Please share it with your friends also. If you have any doubts related to this, let us know in the comment box below.


